
As mentioned in a previous post, I am setting up the intentionally vulnerable GOAD lab on a spare desktop using a fresh install of the Linux operating system Debian 12 and Virtualbox, and using a virtualized router/firewall called PFSense to create the private GOAD network.
GOAD installs using a variety of Vagrant scripts to deploy the virtual machines using the Virtualbox provider. Also, through trial and error I found that a specific version of Virtualbox is required to run these scripts in “headless” mode. This can be achieved by adding the required repository to the /etc/apt/sources.list file in Debian. First, we must add grab the gpg keys for vagrant.
wget -O - https://apt.releases.hashicorp.com/gpg | sudo gpg --dearmor -o /usr/share/keyrings/hashicorp-archive-keyring.gpg
Next we can sign the repository with the downloaded key:
echo "deb [arch=$(dpkg --print-architecture) signed-by=/usr/share/keyrings/hashicorp-archive-keyring.gpg] https://apt.releases.hashicorp.com
Then we can add the repository to a new directory in /etc/apt/sources.list.d
$(lsb_release -cs) main" | sudo tee /etc/apt/sources.list.d/hashicorp.list
Then upgrade and install vagrant
sudo apt update && sudo apt install vagrant
Next, we can install the required vagrant plugins, notice that vagrant is going to use winrm to make changes to the virtual machines this will come in handy later.
vagrant plugin install vagrant-reload vagrant-vbguest winrm winrm-fs winrm-elevated
Next, load the gpg keys for the version of Virtualbox that allows headless mode:
sudo apt install curl wget gnupg2 lsb-release -y
curl -fsSL https://www.virtualbox.org/download/oracle_vbox_2016.asc|sudo gpg --dearmor -o /etc/apt/trusted.gpg.d/vbox.gpg
curl -fsSL https://www.virtualbox.org/download/oracle_vbox.asc|sudo gpg --dearmor -o /etc/apt/trusted.gpg.d/oracle_vbox.gpg
echo "deb [arch=amd64] http://download.virtualbox.org/virtualbox/debian $(lsb_release -cs) contrib" | sudo tee /etc/apt/sources.list.d/virtualbox.list
sudo apt update
sudo apt install linux-headers-$(uname -r) dkms -y
sudo apt install virtualbox-7.0 -y
Next, because my system has secure boot enabled I had to self-sign the virtualbox kernel drivers. This can be done as follows:
sudo mokutil --import /var/lib/dkms/mok.pub This command will prompt you for a one time password which will be used at boot to load the kernel drivers we downloaded with the virtualbox packages.
You can check which keys will be loaded at next boot with the following command:sudo mokutil --list-new
Then, reboot the system and enter the password when prompted. We can check if the key has been loaded by using the following command:sudo dmesg | grep cert
After the reboot, Virtualbox should be listed in your applications. As the GOAD setup scripts also use python we need to make sure that python and python virtual environments are installed as such:
sudo apt install python3.11
sudo apt install python3.11-venv
Next, we can clone the GOAD repository from https://github.com/Orange-Cyberdefense/GOAD
git clone https://github.com/Orange-Cyberdefense/GOAD.git
The setup script “goad.sh” is located in the main directory of the repository. Run the script through bash and select Virtualbox as the provider.
Note: The script initially gave me a “box constraint” error for deploying the boxes via vagrant. There is a quick fix for this issue which probably has to do with a changed url or permissions of the hashicorp vault containing the base Windows images. Instructions to remediate this issue can be found here if you run into them.
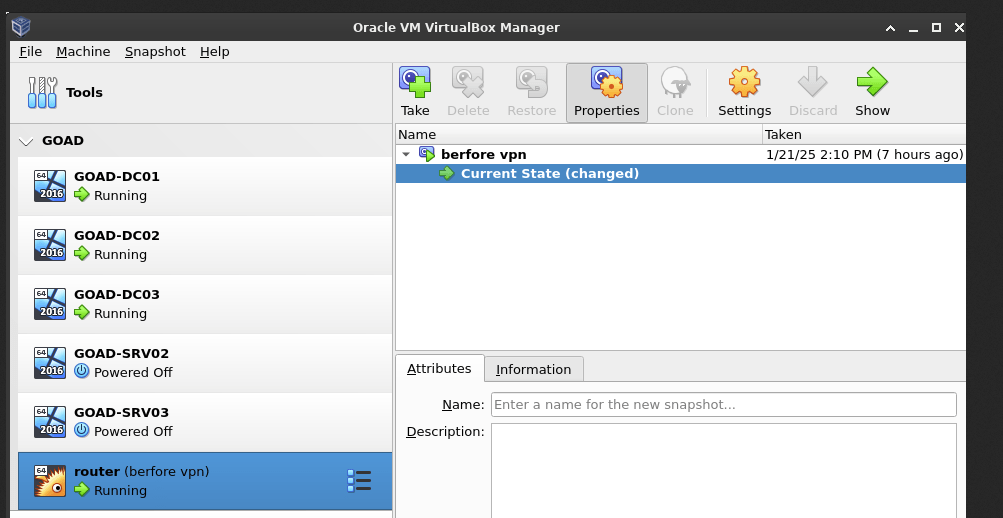
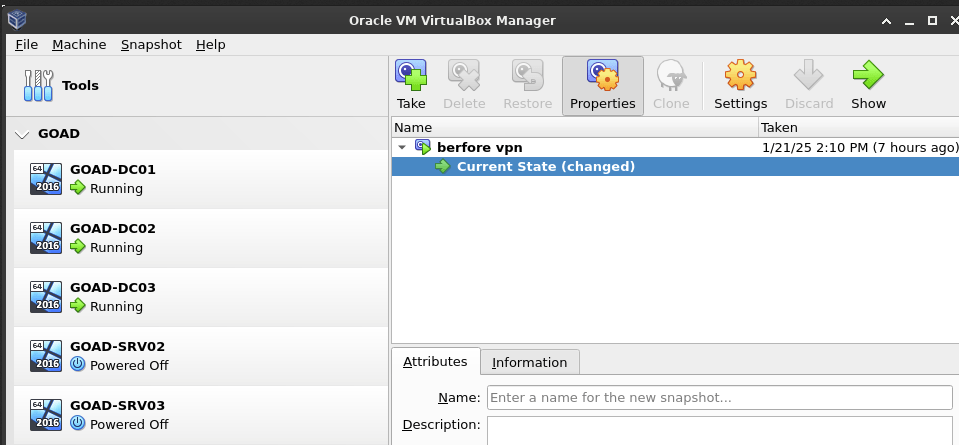
The script took about 30 minutes but at the end we are left with five Virtual Machines!
PFSense setup
Setting up the PFSense firewall/router is straightforward at this step. Simply download the iso file from the pfsense site and create a new Virutal Machine using Virtualbox. For my PFSense I set the machine resources to 2 GB of RAM and 30 GB of hard drive space. From there when you start up the VM you will be run through a configuration script, here I selected all default settings for partitioning the hard disks.
Before rebooting the VM I made sure that the VM had two virtual network interfaces. We want to configure this for one to connect to the “internet” via our local network. The second LAN interface will be a PFSense managed local network (in Virtualbox these are termed “Host-Only” network adapters). After reboot, the configuration script will be run on the command line allowing us to configure these Ip Addresses.
As shown below my PFSense is getting a WAN (“internet”) connection from my physical router via DHCP and I set the LAN to 10.3.0.1/24. PFSense can even set up a DHCP server for the LAN, however I used Static configurations so I must remember to set the Default Gateway and DNS to the router LAN IP address to use it to access the internet.

Changing VM networking to reflect our new network
By default the GOAD machines have two network interfaces configured, a NAT interface to reach the internet using your host device’s IP address and a Host-Only adapter to connect the Domain in a local network. Since we are using the PFSense router to access the internet, we will need to remove the NAT interfaces and configure the GOAD machines to use the Host-Only adapter used on the LAN for PFsense.
Administering the machines remotely
Making IP address changes can be done on the five machines manually, by logging into each as username:vagrant and password:vagrant. This provides a local Administrator user with which the Network Settings can be changed on the machine. However, for fun I decided to set up the lab to be able to administer remotely. This requires that we investigate how vagrant was connecting to the machines. It turns out that each NAT interface is sharing the same IP Address with different ports mapped via NAT to allow access via SSH and WinRm to the hosts. WinRm seems like the logical choice to get a powershell session to change IP Addresses remotely. We can view the port-forwarding rules for each NAT interface in Virtualbox by clicking the adapter and selecting “Advanced” as shown below:
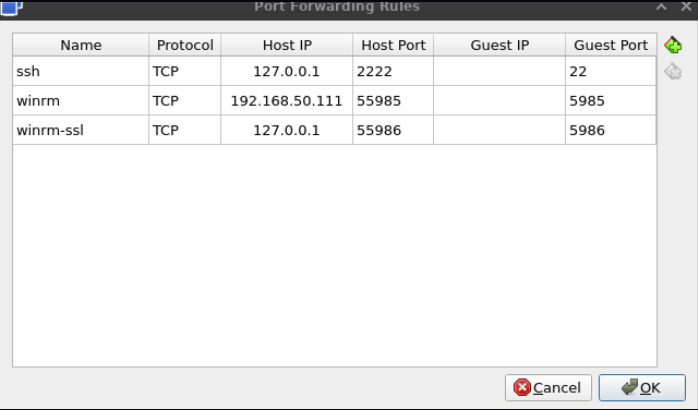
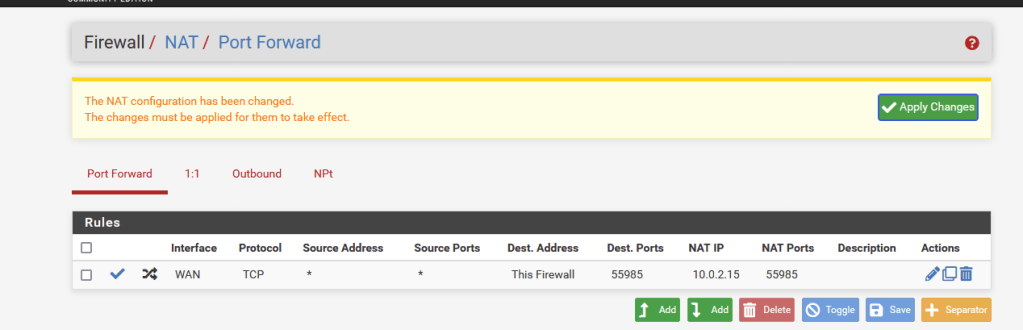
I changed the host-IP for winrm in each of these entries to reflect the IP Address of the HOST machine (Debian 12), so that I could access the machines from my Windows laptop to utilized powershell commands. Then we must create port forwarding rules in PFSense so that when we connect using the PFSense router WAN IP address, we are actually connecting to the individual GOAD boxes. An example of this type of rule is shown below:
With networking in place, I worked to get the internal GOAD network set up as shown in the following table:
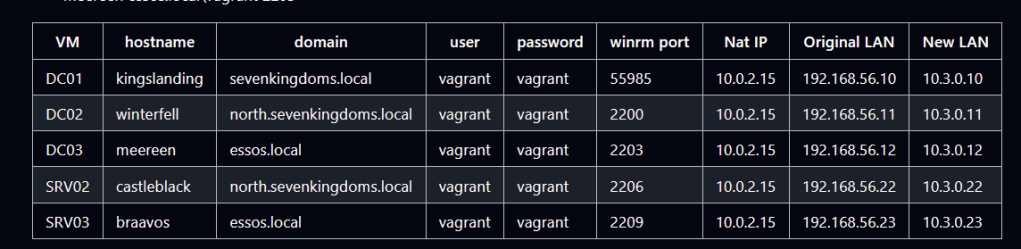
I created a script on my Windows laptop to run on each of the machines, I noticed that the internal GOAD network had IP addresses in the 192.168.56.0/24 range, so the following script finds the interface that has these addresses and asks the user to enter a new one (in my example in the 10.3.0.0/24) range.
$dgw = '10.3.0.1'
$subnetmask = 24
$family = "IPv4"
$oldIP = (Get-NetIPAddress | ? {$_.IPAddress -like "192.168.56.*"}).IPAddress
$lanif = (Get-NetIPAddress | ? {$_.IPAddress -like "192.168.56.*"}).InterfaceIndex

$newip = Read-host("Enter new IP address")
Write-Host ("Removing $oldIP from $env:COMPUTERNAME and adding $newip")
try {
    Remove-NetIpAddress -IPAddress $oldIP -InterfaceIndex $lanif -AddressFamily $family
    New-NetIPAddress -IPAddress $newip -InterfaceIndex $lanif -AddressFamily $family -DefaultGateway $dgw -PrefixLength $subnetmask
}
catch {
    Write-Host ("Something went wrong")
    exit 1
}
Write-Host("Completed")
Get-NetIpAddress -InterfaceIndex $lanif -AddressFamily $family | Select-Object InterfaceIndex,IPAddress
This script can be run on each box using WinRm with the following commands, just be sure to add the specifics in the placeholders to fit the system you are working on:
$pw = ConvertTo-SecureString -AsPlainText -Force 'vagrant'$cred = New-Object System.Management.Automation.PSCredential('vagrant',$pw)Invoke-Command -ComputerName <ip address of the PFSense router WAN> -Port <port specified in port forwarding> -File <saved ps1 file of script> -Credential $cred
Note: by default WinRM or “WSMAN” connections on Windows systems are only allowed between “Trusted Hosts” or those in the same domain or workgroup. Because the GOAD network includes several domain of which my local windows machine are not joined, I had to create a wildcard exception for blanket WinRm like this:
Set-item -Path WSMan:\localhost\Client\TrustedHosts -Value *
Its probably not a good idea to leave this configuration in this manner as it could lead to some easy lateral movement in a production environment but serves our temporary purpose.
With these local network adapters configured we can delete the NAT adapters for each virtual machine, and work on setting the adapters to point to the proper DNS Servers for the domains to work.
DNS Settings
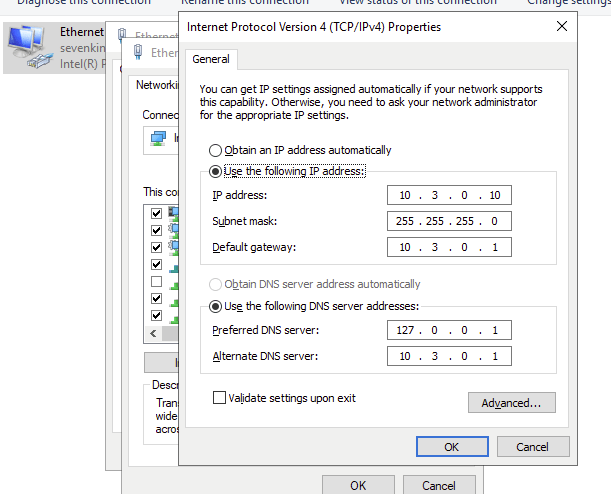
Because there are three domains in the GOAD setup each with distinctive trust relationships I changed the DNS setting on each box manually. Ensure that each domain controller points to itself (127.0.0.1) as the primary DNS server, as well as the Router LAN ip for secondary DNS. An example of how this looks on the kingslanding.sevenkingdoms.local machine is shown below:
Next, ensure that each machine joined to a particular domain has the IP Address of the corresponding domain controller as its primary DNS. For instance, the braavos.essos.local server will need to resolve the essos.local domain so I set the DNS ip to that of the meereen.essos.local machine.
Conditional Forwarders
To facilitate the trust relationships between domains and forests in the environment, we must ensure that each domain can resolve host names in other domains. This is done through “Conditional Forwarders” which forward specific DNS queries to specific servers first. These forwarders are already active in the GOAD environment, all we need to do is go into each domain controller and update the Ip Addresses. An example of this on kingslanding.sevenkingdoms.local showing conditional forwarding for the north.sevenkingdoms.local and essos.local domains is shown below:
Wrapping Up
Now all domain machines should be able to resolve each hostname. This can be tested using “nslookup” or similar utility. Also at this point we can delete the NAT firewall rules we created in PFSense. The GOAD machines are not accessible from the network at this point, but we will configure the Site-To-Site VPN in later posts to connect this domain to others, the attack box, and the WAZUH siem.