For this portion of my lab, I chose to use VMware workstation installed on my daily driver laptop. I already had this software installed so creating the Virtual Machines was a simple process. In this lab, I will start have 5 VMS including:
- PFSense Router/Firewall
- Ubuntu Server hosting the Wazuh SIEM
- Windows Server Core for Domain Controller
- Windows Server Core for Certificate Authority
- Windows 10 Enterprise Desktop Client
PFSense
Similar to the previous posts I set up a firewall to manage access to the LAN which will host the “Distributed” version of the ADCS lab. This version will likely take several forms, initially branching off from the all-in-one model to install the Certificate Authority Role on another Windows server instance other than the Domain Controller. Eventually this will incorporate a Standalone server acting as an offline Root Certificate Authority, with an Intermediate or Issuing CA as a domain joined resource from which certificates can be granted.
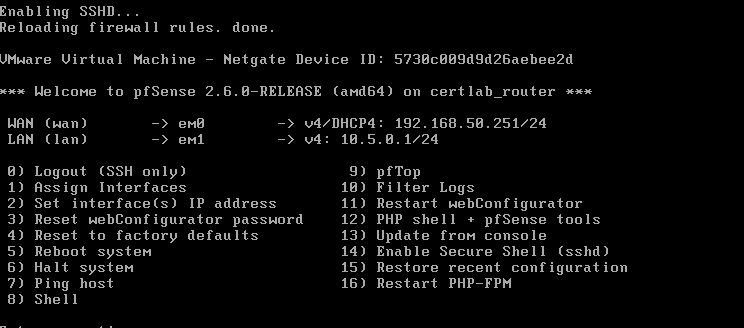
For now, I just set up the firewall to gain an IP Address via DHCP and create a new LAN in the range 10.5.0.0/24. Creating Virtual Machines and Network Adapters in VMWare is a breeze, as the “New Virtual Machine” wizard gives plenty of guidance on doing so. Here again, I created a Virtual machine with 2GB of RAM, two network interfaces (one bridged and another “host-only”). In the end my PFSense box looked like this.
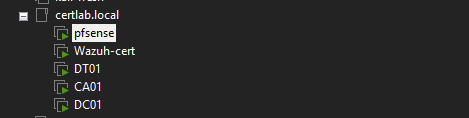
Virtual Machines
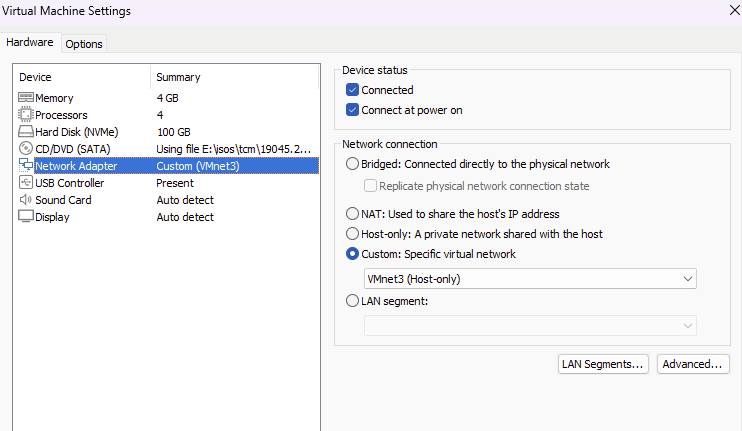
This portion of the lab will have four virtual machines, besides the router/firewall. Similar to how I created the three Windows machines in the Simple ADCS install post, I will create 2 Windows Core servers, a Windows 10 enterprise desktop, with the addition of an Ubuntu 24.04 server to serve as the Wazuh SIEM. Installation of the virtual machines is similar to doing so in Proxmox, as VMWare Workstation does a good job of recognizing the operating system and handles all the EFI partition creation automatically. Ubuntu 24.04 is also automatically detected, and can be created quite easily. All these VMs are attached to a Host-Only network adapter, in my case its called VMNet 3 and can be selected in the Custom options in VM settings.
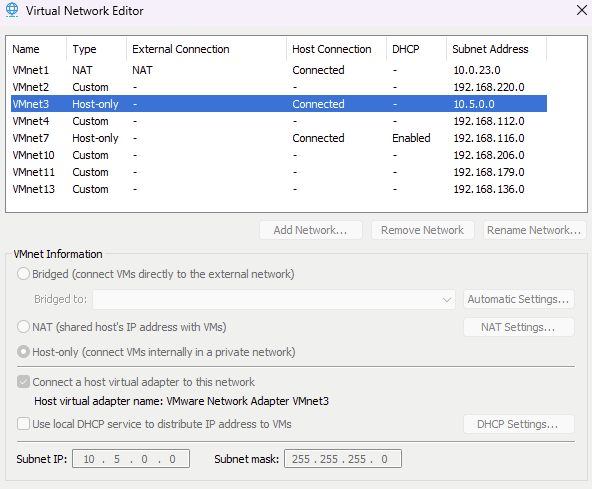
Workstation comes with a handy utility called “Virtual Network Editor” that allows us to specify the network ranges for virtual networks along with whether the VM Network itself handles DHCP. Because we are using the PFSense router, and we will be setting Static IPs, I disabled DHCP and set the range to that of the LAN on PFSense.
Creating the Domain
Domain creation using Powershell is covered in a previous post and can be carried out the same way. The domain in this portion is called “certlab.local” and instead of designating the second Windows Server Core instance as SRV01, I gave it the hostname of CA01 as the Certification Authority will be handled on this machine rather than the Domain Controller, DC01, in this lab.

Setting static IP in Ubuntu
By default the Ubuntu server is using netplan to configure ip addressing for interfaces. To set a static ip we can create a file in the form of 10-netplan-ens33.network, remembering to change the ens33 part to reflect your actual network adapter name.
Then in this file the static ip can be set:
[Match]
Name=ens33
[Network]
LinkLocalAddressing=ipv6
Address=10.5.0.5/24
DNS=10.5.0.1
[Route]
Destination=0.0.0.0/0
Gateway=10.5.0.1
And the interface restarted with systemctl restart systemd-networkd
Wrapping up
In this section we created the VMS to support the ADCS lab which will host the Certificate Authority on a Domain joined computer. Also, the host for the Wazuh SIEM was created. Again a PFSense firewall will be used to isolate the internal network, allow us to allow secure access to other labs via a VPN at a later time. At the end, this portion of the lab looked like this: