
The first install will focus on the basics of ADCS by creating a domain and installing the Enterprise Root Certificate Authority and associated services directly on the Domain Controller. While this is not considered best practices by a long shot, this will allow for the simplest playground possible for learning how to deploy certificates for use in the domain. This lab is being built in the “DMZ lab” section of the lab as detailed in a previous post, on Proxmox installed as the operating system on an Intel NUC.
Installing Windows Server Core
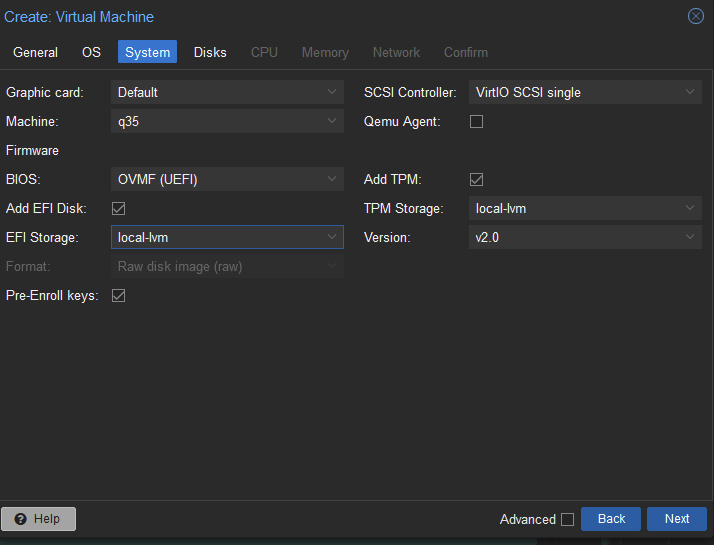
To create VMS with the smallest footprint possible, I will be creating two instances of Windows Server Core, a command-line only version of Server 2022. In addition a single Windows 10 workstation will be installed so that we can administer the domain servers via RSAT ( a way to connect graphically to domain machines). The VM install process for Windows VMS is very similar to creating VMs like we did with PFSense and the Linux distros earlier, with the one addition of adding a EFI drive to boot from.
I had an iso stored on a removable hard drive, so I used scp to copy it directly to the Proxmox server however the Proxmox WebUi can be used to upload as well.

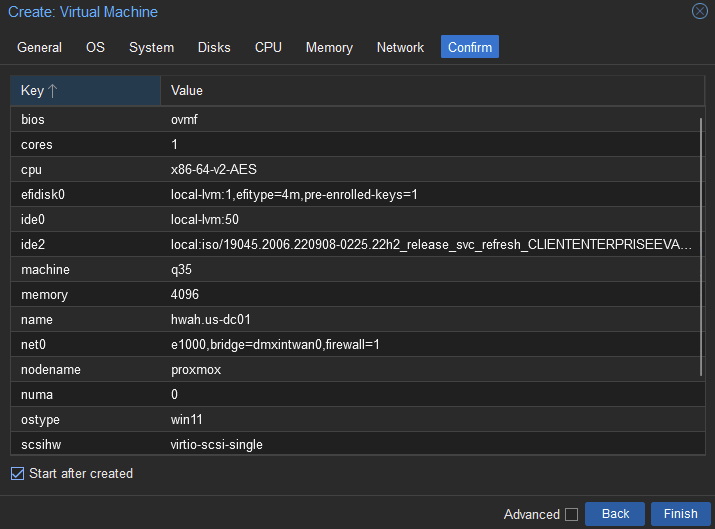
First we create the VM specifiying the Guest OS as Windows, as shown below Proxmox correctly identifies the file as Windows Server 2022.
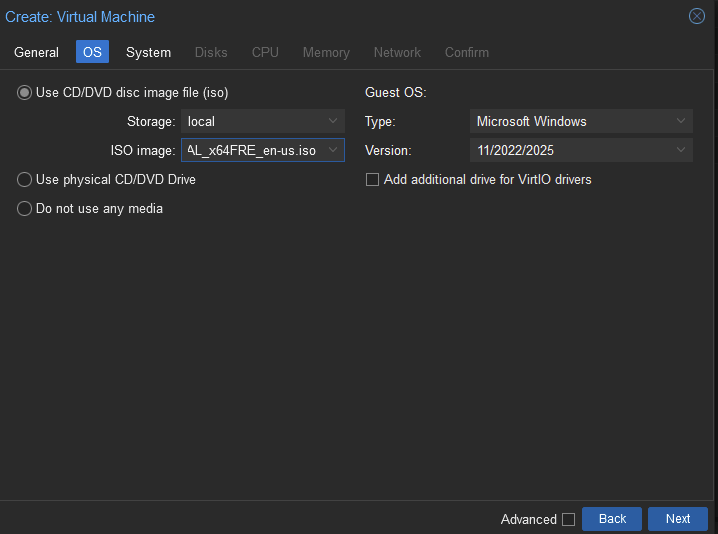
The BIOS is automatically selected as UEFI which is fine.
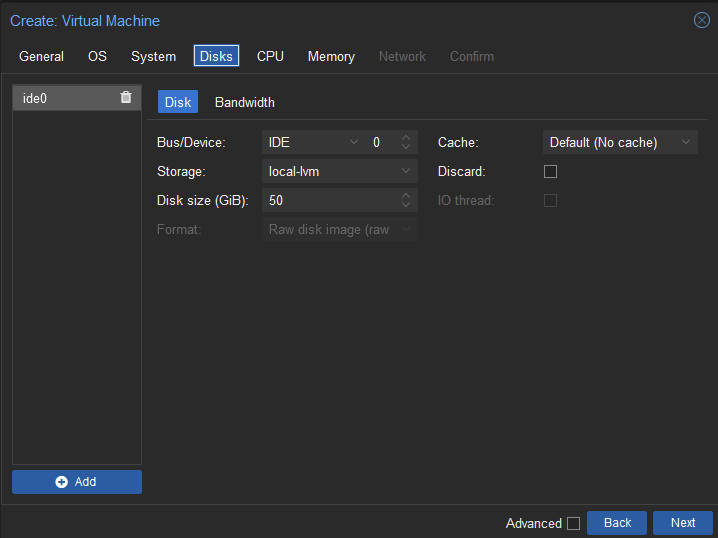
I created a hard drive 50GB in size, should be enough for our minimal installation.
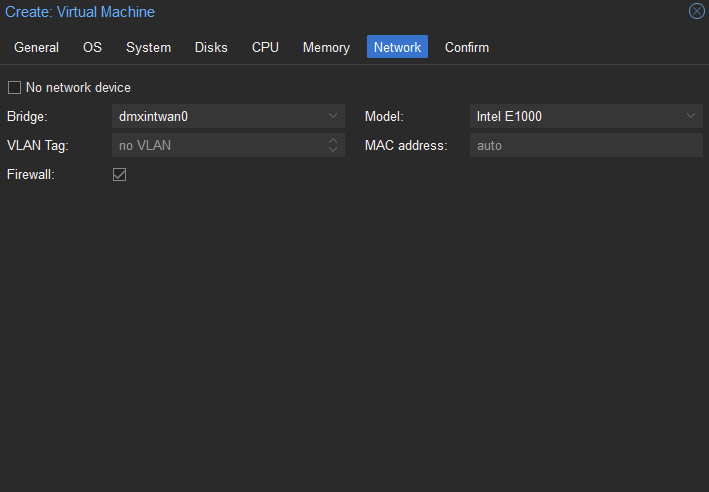
For network adapter I select the internal DMZ lan interfaces as this will be behind the second firewall in the DMZ lab.
Set the VM to “Start after created” to boot immediately.
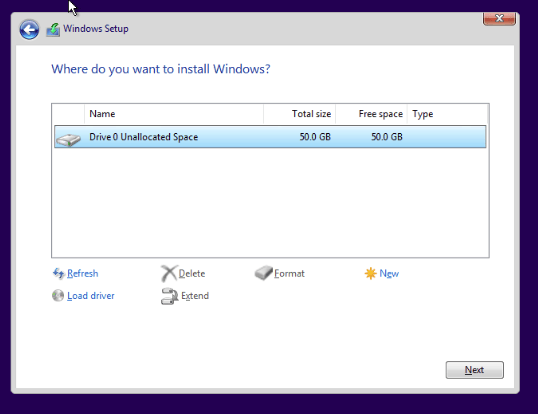
We are then presented with various options for installing windows. Be sure to allocate the full hard drive to the install.
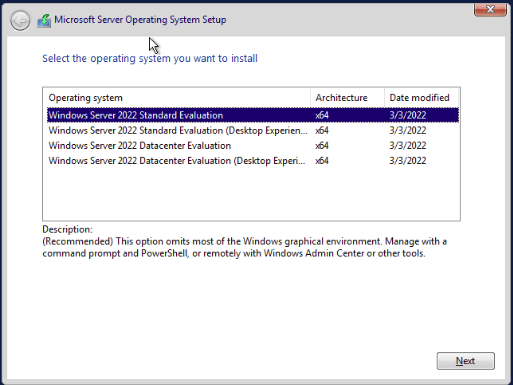
And selecting Windows Server 2022 Standard Evaluation will create the Windows Server Core version.
We are prompted to change the Administrator user password, and successfully create the machine.
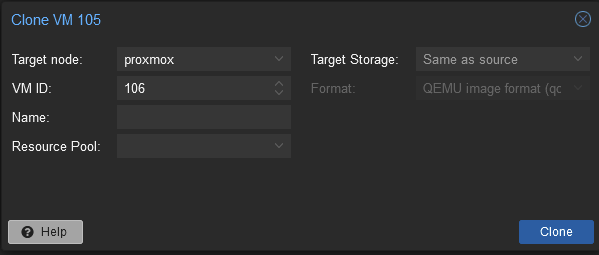
Next, since the domain server machine will be using the same we can shutdown the machine and clone as SRV01.hwah.us.
Important Note: after cloning the system boot into the machine and run the sysprep executable to “generalize” the installation by running:
C:\Windows\System32\sysprep\sysprep.exe /oobe /generalize /reboot
This will ensure that the machine has different security attributes than the machine it was cloned from!
I followed the exact same steps to create the Windows 10 VM. The next steps will be to configure the static ips, domain controller, and certificate services.
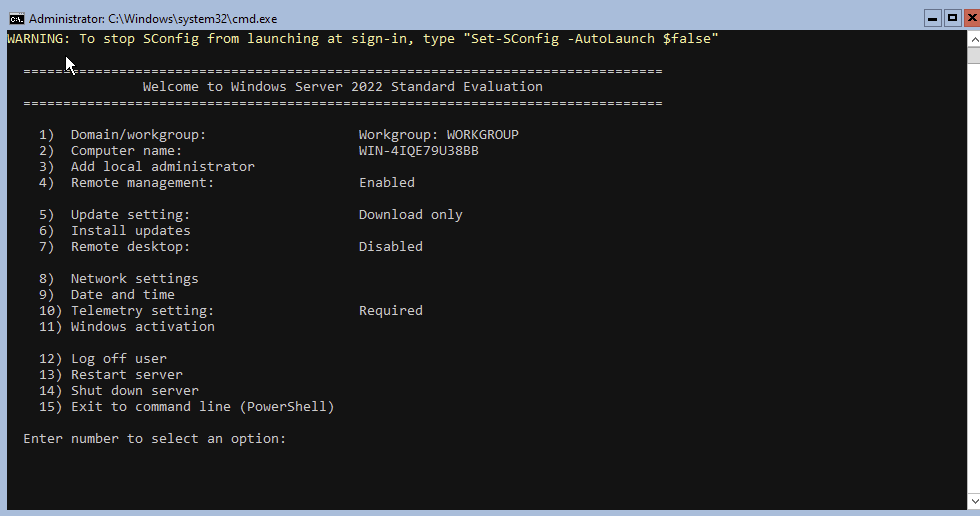
Setting static IPs
This can be achieved using the Sconfig menu, and selecting Network settings. I will be setting the DC01.hwah.us machine, SRV01.hwah.us and DT01.hwah.us machines to 172.21.0.2,3, and 4 respectively.

And on Windows 10 using the GUI.
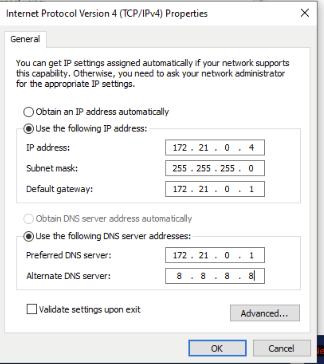
Similarly, DNS settings can be specified here. To begin I set DNS to the router at 172.21.0.1 and 8.8.8.8 as a backup. This will need to be changed once the domain is up and running. Again, to remotely administer these machines we will enable PSRemoting (WinRM) this is done with the command:
Enable-PSRemoting
and then to allow Administrative conrol, we must run:
winrm quickconfig
and accept the LocalAccountTokenFilterPolicy prompt.

I ran into an error running this command on Windows 10. As the domain has not been set up, the network is set to the Public profile and the automatic firewall rules are not updated (wisely!). We will temporarily allow winrm through all profiles using the command:
New-NetFirewallRule -Name "temp allow winrm" -profile any -protocol TCP -Direction Inbound -LocalPort 5985 -Enabled True -DisplayName "temp allow winrm" -Action Allow
Next we will have to open some ports on the firewalls to allow winrm in temporarily.
On the DMZ external router it will look something like this, using NAT rules to translate specific ports to the IP address of the Internal DMZ router.

And on the internal translate the packets received at the Firewall WAN address to the appropriate internal hosts for port 5985
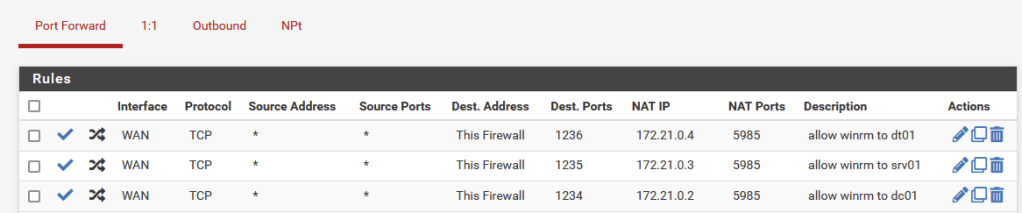
Once the firewall rules are in place we can connect just as shown in the previous post this time using the IP Address of the External DMZ router, and the port specified for each internal instance of WinRm

First thing to set up our domain we will need to set the hostnames for the machines as this will automatically be reflected in the DNS records once the domain is built. I will use Invoke-Command to do this:
$dc01 = Get-PSSession -Name dc01
Invoke-Command -session $dc01 -ScriptBlock { Rename-Computer -NewName DC01}
We will be required to reboot for the new hostname to become permanent. After establishing winrm connections again, we can test for the changed hostnames with the following command
Invoke-Command -Session $dc01,$srv01,$dt01 -ScriptBlock {hostname}

Next, I installed the AD Domain tools with
Invoke-Command -session $dc01 -ScriptBlock {Install-WindowsFeature AD-Domain-Services -IncludeManagementTools}
Then set a local vairable called $dsrmpw to save the clear text safe mode password (for domain recovery) as a Secure String:
$dsrmpw = ConvertTo-SecureString -AsPlainText -Force 'mysupersecurepassword'
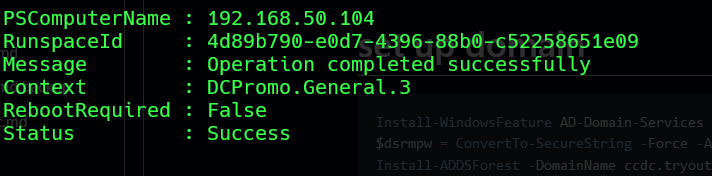
Promote the server to a domain controller with:
Invoke-Command -Session $dc01 -ScriptBlock {Install-ADDSForest -DomainName hwah.us -InstallDNS -SafemodeAdministratorPassword $using:dsrmpw}
Lets check if everything went well by making an ADDS DNS query. First to restablish winrm connection we must use our new Domain Admin credential:
$cred = New-Object System.Management.Automation.PSCredential('hwah\Administrator',$pw)
$dc01 = New-PSSession -ComputerName 192.168.50.104 -Port 1234 -Credential $cred
Invoke-Command -Session $dc01 -ScriptBlock {Get-DNSServerResourceRecord -Computername DC01 -ZoneName hwah.us}

This should give us a printout of all the default DNS configurations for a domain Controller.
Finally, lets install ADCS on the domain controller using the following commands, for this I will Enter-PSSession $dc01.
Get-WindowsFeature -AD-Certificate

This displays that the feature is available, install with:
Get-WindowsFeature -Name AD-Certificate | Install-WindowsFeature

Using Get-Command -Module ADCS* we can see that there are quite a few ADCS cmdlets to use, as we will be setting up a Certificate Authority on the Domain Controller we will use Install-ADCSCertificationAuthority
Running this command it doesn’t seem like much happened, but if we check our drives we now have a Cert drive;
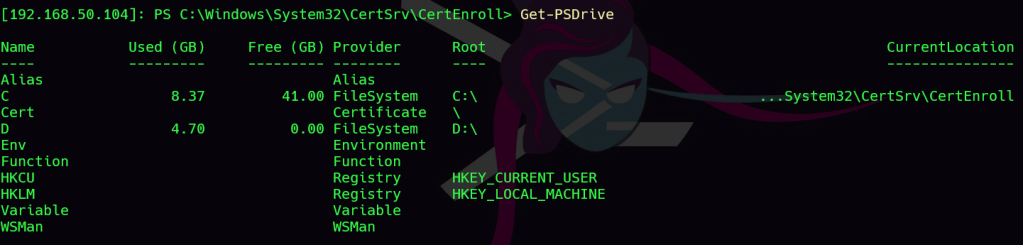
By navigating to the Cert:LocalMachine\CA directory we can see that indeed a Root CA certificate has been created for the domain, with the additional Canonical Name added for our Certificate authority.

Next lets join the SRV01 and DT01 machines to the domain. First we must point DNS to the domain controller. Enter a PSSession for SRV01 and run the following:
$dns = @("172.21.0.2","172.21.0.1")
$if = (Get-NetAdapter | ? {$_.Status -eq "Up"}).ifIndex
Set-DNSClientsServerAddress -InterfaceIndex $if -Addresses $dns
We can test this by using the Resolve-DNSName dc01 command

If we get back the ip address for our domain controller, we are good to move onto the next step.
For this enter a PSSession and join the domain with the following commands:
$pw = Read-Host -AsSecureString
This will prompt you for the Domain Admin account from the Domain Controllers password, enter it carefully
$cred = New-Object System.Management.Automation.PSCredential('hwah\Administrator', $pw)
Add-Computer -DomainCredential $cred -Domain 'hwah.us'

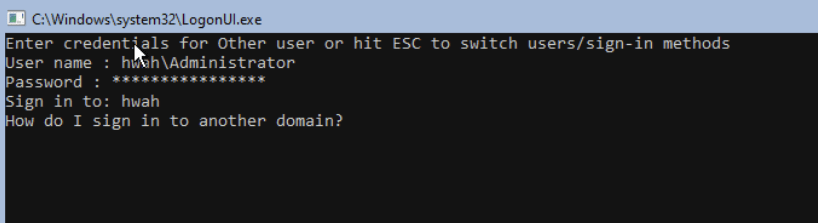
After rebooting the computer we are able to login as Domain Administrator as shown below
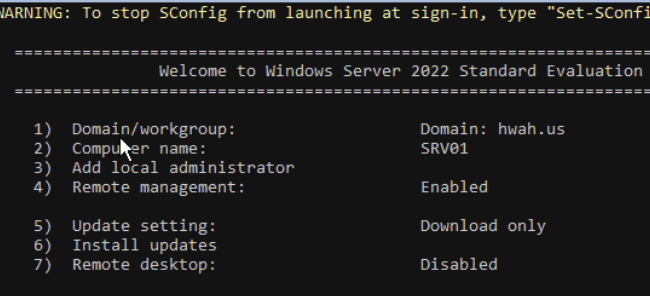
Confirm that the proper domain is configured in Sconfig:
Repeat the same steps to add DT01 to the Domain. The Remote Administration Suit RSAT can be added by running the following command:
Get-WindowsCapability -Online -Name RSAT* | Add-WindowsCapability -Online
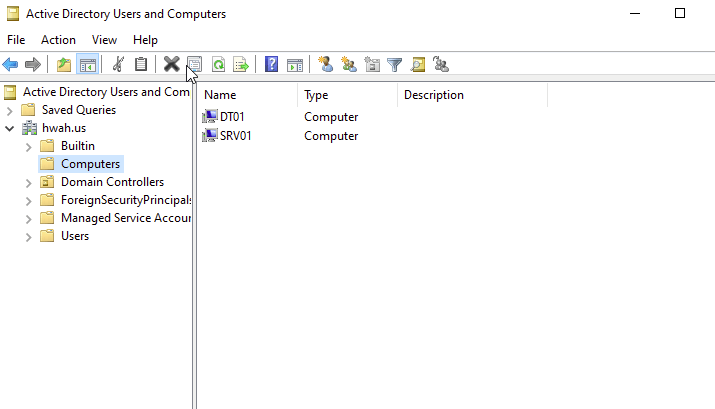
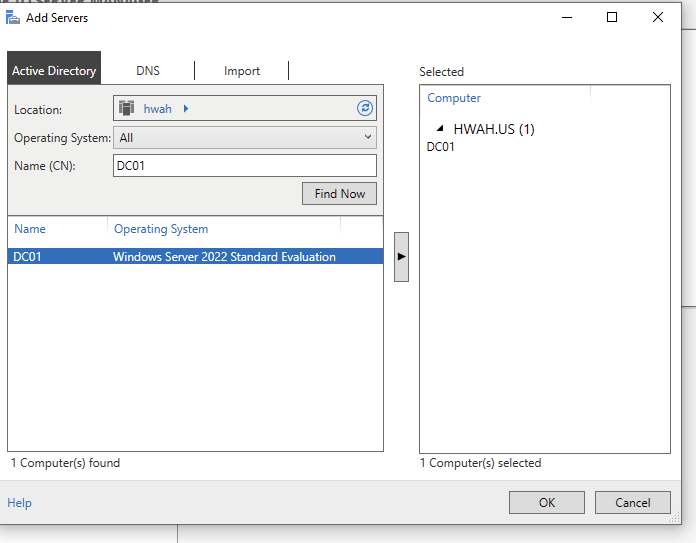
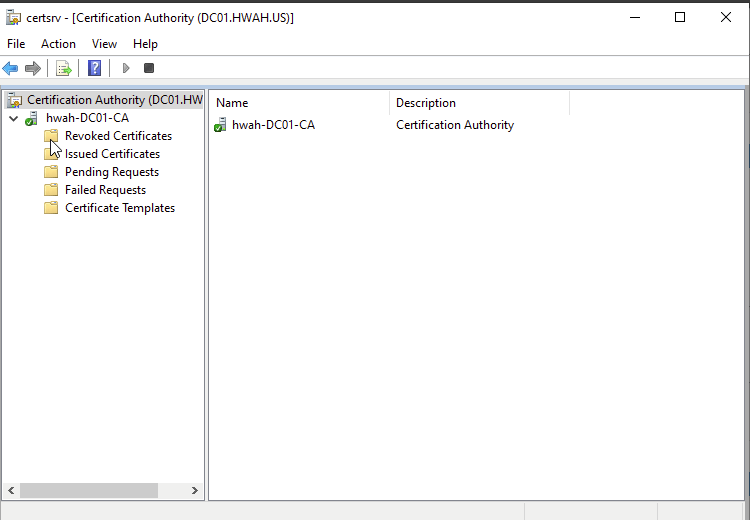
With RSAT we can see the domain computers and Certification Authority information.
Wrapping up
Creating the certification in an all-in-one setup was quite simple once the domain was created. All the steps in this tutorial could be completed using the local console itself, but using WinRm allowed for quick copying and pasting of commands and chaining commands for execution on multiple machines. I made sure to remove the firewall rules that I set up to access the machines, as in the next steps we will be networking this domain together with others and now we have a domain joined Windows 10 machine with a GUI to administer the domain with RSAT tools if we choose to.
